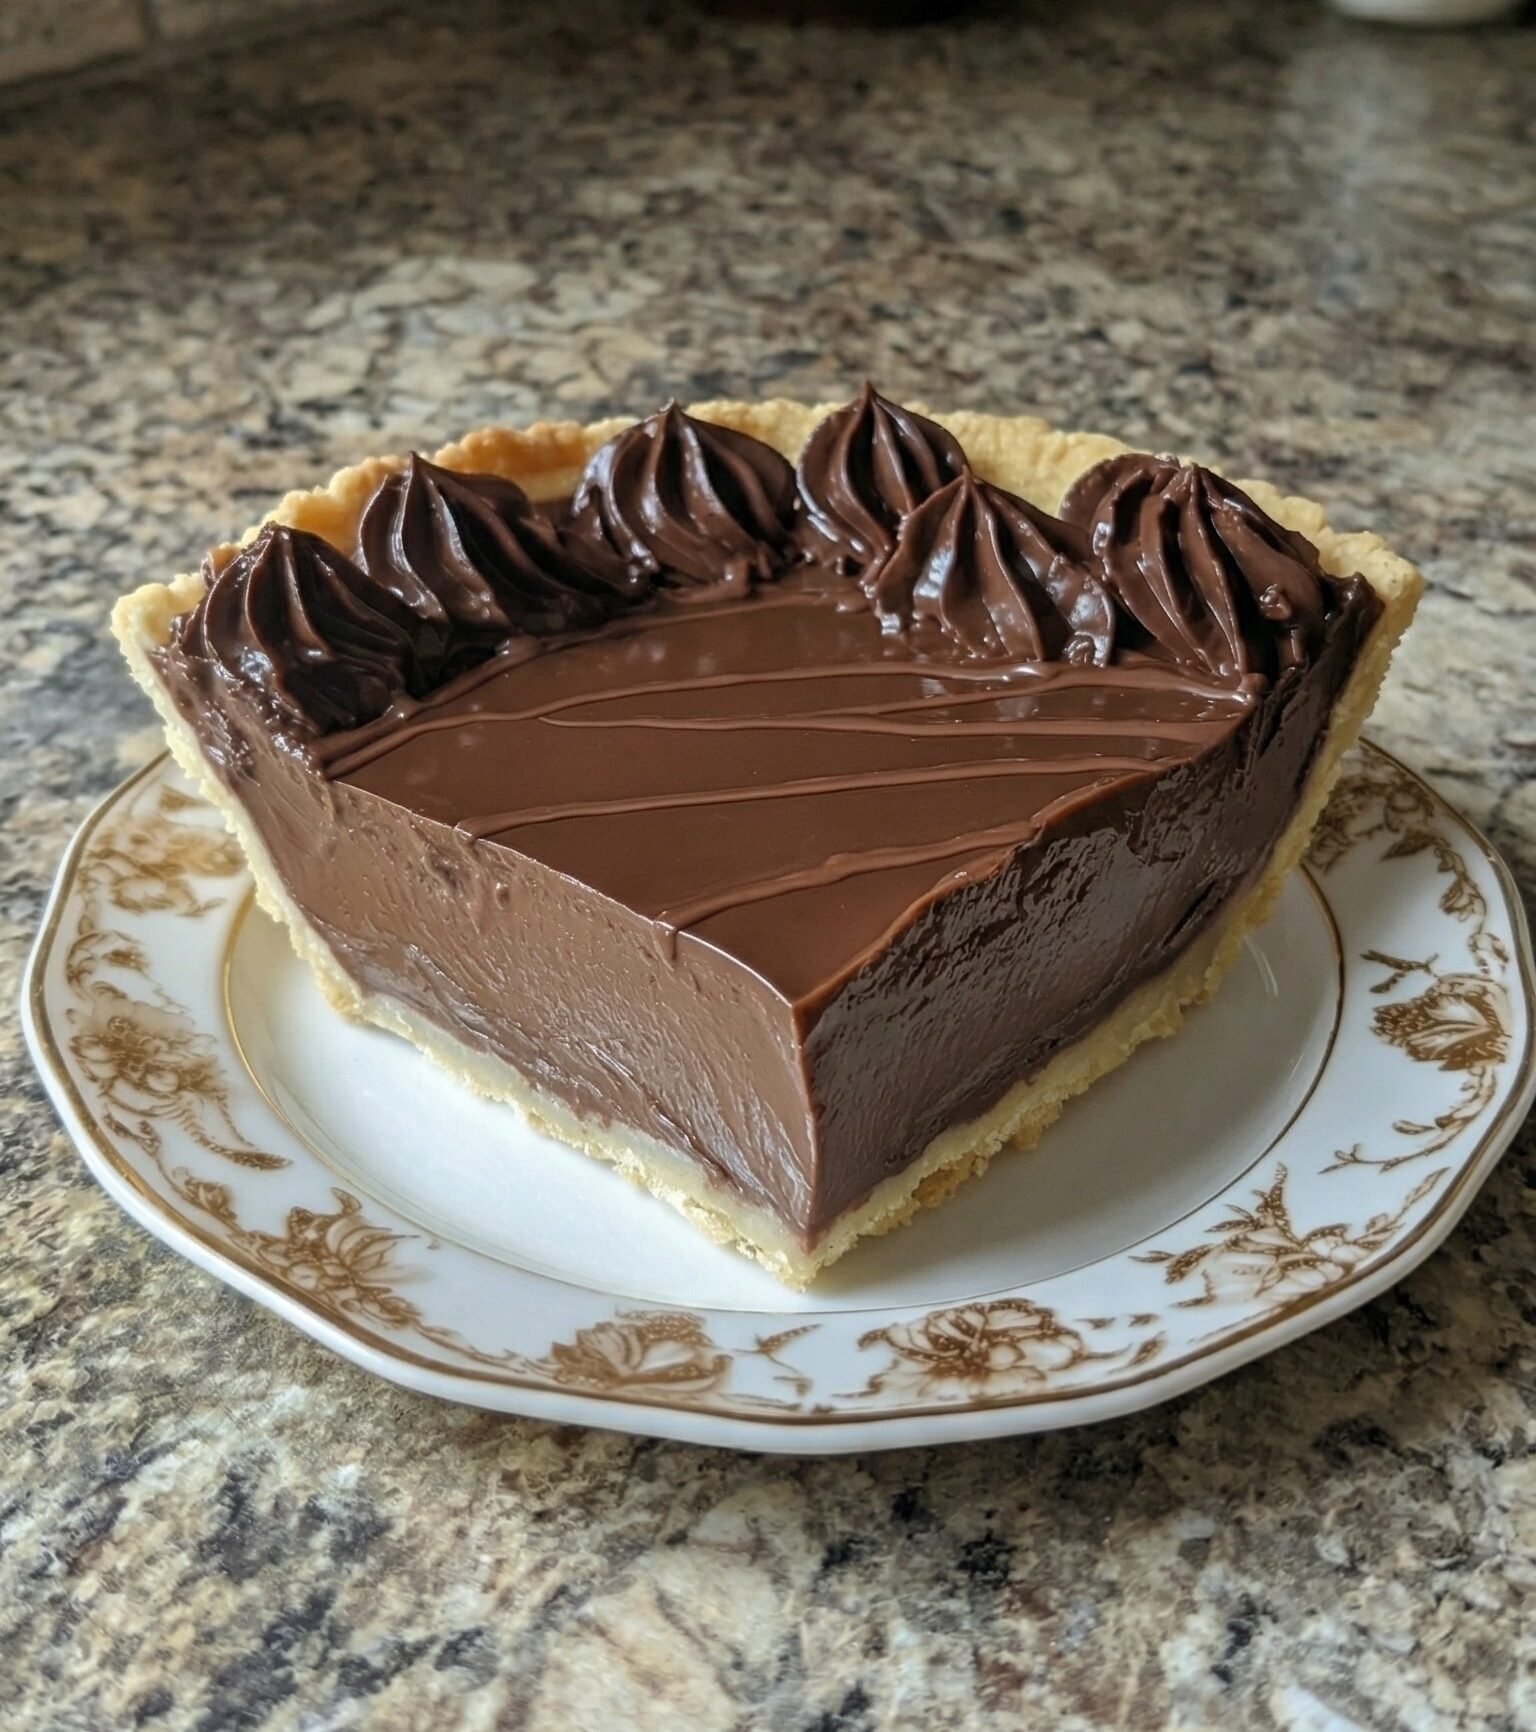
Are you looking for a comforting chocolate dessert that brings back wonderful childhood memories? This old-fashioned chocolate pie features a wonderfully rich, creamy filling poured carefully over a flaky baked crust. You can make it using very simple, basic ingredients right from your own kitchen pantry and household refrigerator.
This classic sweet treat works perfectly for large family gatherings or a cozy movie night at home. Anyone who loves dark chocolate will absolutely enjoy the incredibly smooth texture and deep flavor profile. Serving a generous slice of this pie instantly reminds people of the beautiful desserts their grandparents baked.
What Is Old-Fashioned Chocolate Pie?
An old-fashioned chocolate pie is a traditional homemade dessert built around a thick chocolate custard filling. You create this specific filling by cooking milk, sugar, cocoa powder, and egg yolks on your kitchen stove. The careful cooking over heat triggers the flour to quickly thicken the entire sweet liquid mixture.
You then pour that hot, thick chocolate filling directly into a pre-baked pie crust to cool down completely. As the warm pie sits quietly in your cold refrigerator, the creamy custard sets up firmly. This reliable chilling process gives the homemade pie its famous pudding-like consistency that slices perfectly clean.
Why You Will Love Old-Fashioned Chocolate Pie
You will absolutely love this traditional recipe because it tastes incredibly rich without being overly complicated today. The simple cooking process requires no fancy kitchen equipment or highly advanced baking techniques to succeed. You just whisk the basic ingredients together on the stove until they thicken into a beautiful custard.
Every person at your dinner table will eagerly ask you for a second slice of this pie. The delightfully flaky pie crust creates a fantastic, satisfying crunchy texture against the remarkably smooth chocolate filling. You can also easily prepare it a whole day early to save valuable cooking time later.
Required Kitchen Equipment
You need a few standard kitchen tools to construct this classic dessert successfully in your own home. Grab a medium saucepan with a heavy bottom to evenly cook the delicate filling on your stove. A heavy pan securely prevents the sensitive milk and sugar mixture from burning on the bottom.
You also need a sturdy wire kitchen whisk to blend the dry ingredients into the egg yolks. Keep a strong silicone cooking spatula nearby to constantly stir the thick pudding while it cooks hot. Finally, wrap your chilled pie tightly with plastic wrap to firmly prevent a chewy skin layer.
Ingredients
You can easily find all these common baking ingredients right at your local neighborhood grocery store today. Make sure you buy unsweetened cocoa powder, not the sweetened hot chocolate mix found in boxes. Also, ensure you purchase a reliable pre-baked pie crust if you completely prefer avoiding homemade dough today.
Here is exactly what you need to make the recipe:
- 6 tablespoons all-purpose flour
- 3 tablespoons unsweetened cocoa powder
- 1 cup granulated sugar
- 3 large egg yolks
- 2 cups cold milk
- 1 teaspoon pure liquid vanilla extract
- 2 tablespoons unsalted butter (optional)
- 1 (9-inch) pre-baked pie crust
- Whipped cream (for serving)
Substitutions
You can comfortably use different types of milk if you want to experiment with the recipe today. Try using whole milk for the absolute creamiest filling or swap it for simple almond milk successfully. Just remember that plant milks might make the final chocolate filling look slightly thinner than normal.
You can also use a different kind of base crust to change the overall dessert flavor easily. Swap the traditional flaky pie dough for a sweet graham cracker crust or a dark chocolate cookie crust. Both fun options taste fantastic and securely hold the thick chocolate pudding filling very well.
Step-by-Step Directions
Step 1: Prepare the Crust. Carefully bake your store-bought or homemade pie crust entirely according to the package instructions inside your oven. Remove the hot crust from the oven and set it aside safely until it completely cools down. You absolutely must start with a fully cooked pie shell before adding any wet chocolate filling.
Step 2: Combine Dry Ingredients. Grab your medium heavy-bottomed saucepan and place it firmly on your cold kitchen stove right away today. Sift the all-purpose flour, the unsweetened cocoa powder, and the granulated sugar together inside the dry pan. This simple sifting action permanently prevents large dry lumps and ensures very even mixing later on.
Step 3: Add Egg Yolks. Crack the three large egg yolks directly into the dry sugar and cocoa mixture inside the saucepan. Whisk the bright yellow yolks firmly into the dry ingredients until they form a very smooth paste. You will quickly notice the batter looks incredibly thick right now, but that is perfectly normal.
Step 4: Gradually Incorporate Milk. Slowly pour the two cups of cold milk directly into the thick chocolate batter inside the saucepan. Stir the mixture absolutely constantly with your wire whisk to avoid creating any sticky flour clumps here. Continue whisking forcefully until the dark liquid completely blends together and looks entirely free of lumps.
Step 5: Cook the Filling. Move the heavy saucepan over medium heat and stand nearby to supervise the crucial cooking process closely. Cook the filling for roughly ten minutes, stirring continuously so the bottom layer does not burn accidentally. Remove the pan when the chocolate mixture quickly thickens enough to coat the back of a spoon.
Step 6: Finish with Flavor. Carefully pull the hot saucepan completely away from the hot stove burner to protect your hands safely. Stir the pure vanilla extract firmly into the dark chocolate filling to massively enhance the rich flavor. You can also mix in two tablespoons of unsalted butter here to create a remarkably silky texture.
Step 7: Fill the Crust. Quickly grab the cooling saucepan and carefully bring it over to your fully baked and cooled crust. Immediately pour the steaming chocolate filling directly into the center of the waiting pie shell right now. Use your flexible silicone spatula to gently smooth the warm top layer into a perfectly flat circle.
Step 8: Chill Thoroughly. Tear off a clean piece of clear plastic wrap to properly cover the warm chocolate pie dish. Press the clear plastic wrap very gently directly resting against the surface of the warm chocolate filling. This brilliant protective action stops a tough, chewy skin layer from forming while the pie securely chills.
Step 9: Serve. Transfer the safely covered pie into your cold refrigerator for at least two full hours before eating. You can easily keep it chilling comfortably inside the fridge for up to a full twenty-four hours. Top your generous dessert slices heavily with freshly whipped cream right before handing plates to dinner guests.
Notes and Tips
You must stir the liquid filling absolutely continuously while it cooks hot on your kitchen stove today. If you leave the warm pan completely unattended, the thick milk and sugar mixture burns very quickly. A terribly burnt filling ruins the entire pie flavor and permanently wastes your valuable baking time entirely.
Always practice immense patience and allow the warm chocolate pie to chill completely inside your cold refrigerator. If you ignorantly attempt slicing a warm pie quickly, the runny chocolate pudding aggressively floods the plate. The cold air securely sets the gelatinous filling so you can easily cut perfectly straight, sharp slices.
Storage and Freshness
Cover any leftover chocolate pie very tightly with flexible plastic wrap or shiny aluminum foil right away. Place the securely wrapped pie plate deeply inside the cold refrigerator to properly maintain its culinary freshness. It successfully keeps its firm texture and fantastic chocolate flavor perfectly safe for up to four days.
If you proudly added fresh whipped cream to the very top layer, it might securely deflate overnight. Because of this weeping issue, you should strictly add fresh whipped cream immediately before you serve slices. Storing the plain chocolate pie empty guarantees a vastly superior presentation for any lucky future dessert guests.
Serving Suggestions
You must definitely serve this incredible classic dessert heavily chilled for the absolute best possible flavor experience. A giant dollop of fluffy whipped cream scooped on top adds a lovely visual touch right now. The wonderfully light, airy cream perfectly balances the intense, dark richness found deeply inside the thick chocolate.
You can pair this amazing sweet treat beautifully with a steaming mug of strong black coffee tonight. The bitter coffee cuts through the heavy sugar perfectly, naturally making the entire dessert taste incredibly satisfying. Your older guests will absolutely love this highly traditional, deeply comforting pairing after a heavy dinner meal.
Presentation Ideas
You can easily add quite a few pretty dark chocolate shavings right over the fluffy whipped cream. Gently drag a sharp vegetable peeler down the flat side of a cold chocolate bar very quickly. The tiny chocolate curls wonderfully fall gently onto the white cream, making the dessert look highly professional.
Alternatively, arrange a few brightly colored, freshly cut strawberries directly beside every single slice of chocolate pie. The visually striking red fruit produces a gorgeous visual contrast securely positioned against the deep brown chocolate. This remarkably simple decoration quickly signals to guests that you genuinely care deeply about your food presentation.
Final Thoughts
Making a deeply satisfying chocolate dessert for your entire family never requires highly tedious or stressful work. This incredibly simple old-fashioned pie accurately delivers massive flavor while exclusively using common, easily accessible pantry ingredients. Anyone can mix it up quickly, cleanly bypassing those overly complicated baking recipes that demand massive effort.
We sincerely hope you genuinely enjoy crafting this remarkably rich, creamy dessert the very next time you cook. Try bringing a giant, beautifully decorated pie completely intact to your next large holiday party or backyard potluck. Watch how fast people immediately eat it, and get totally ready to securely share this easy recipe.